If you’ve ever watched someone set a dessert on fire at the dinner table, you’ve probably seen baked Alaska in action. This retro classic combines cold ice cream, a layer of cake, and a torched meringue shell into one dramatic finale. It looks like something only a professional pastry chef could make. But baked Alaska is genuinely approachable once you understand its three simple parts.
What Is Baked Alaska?
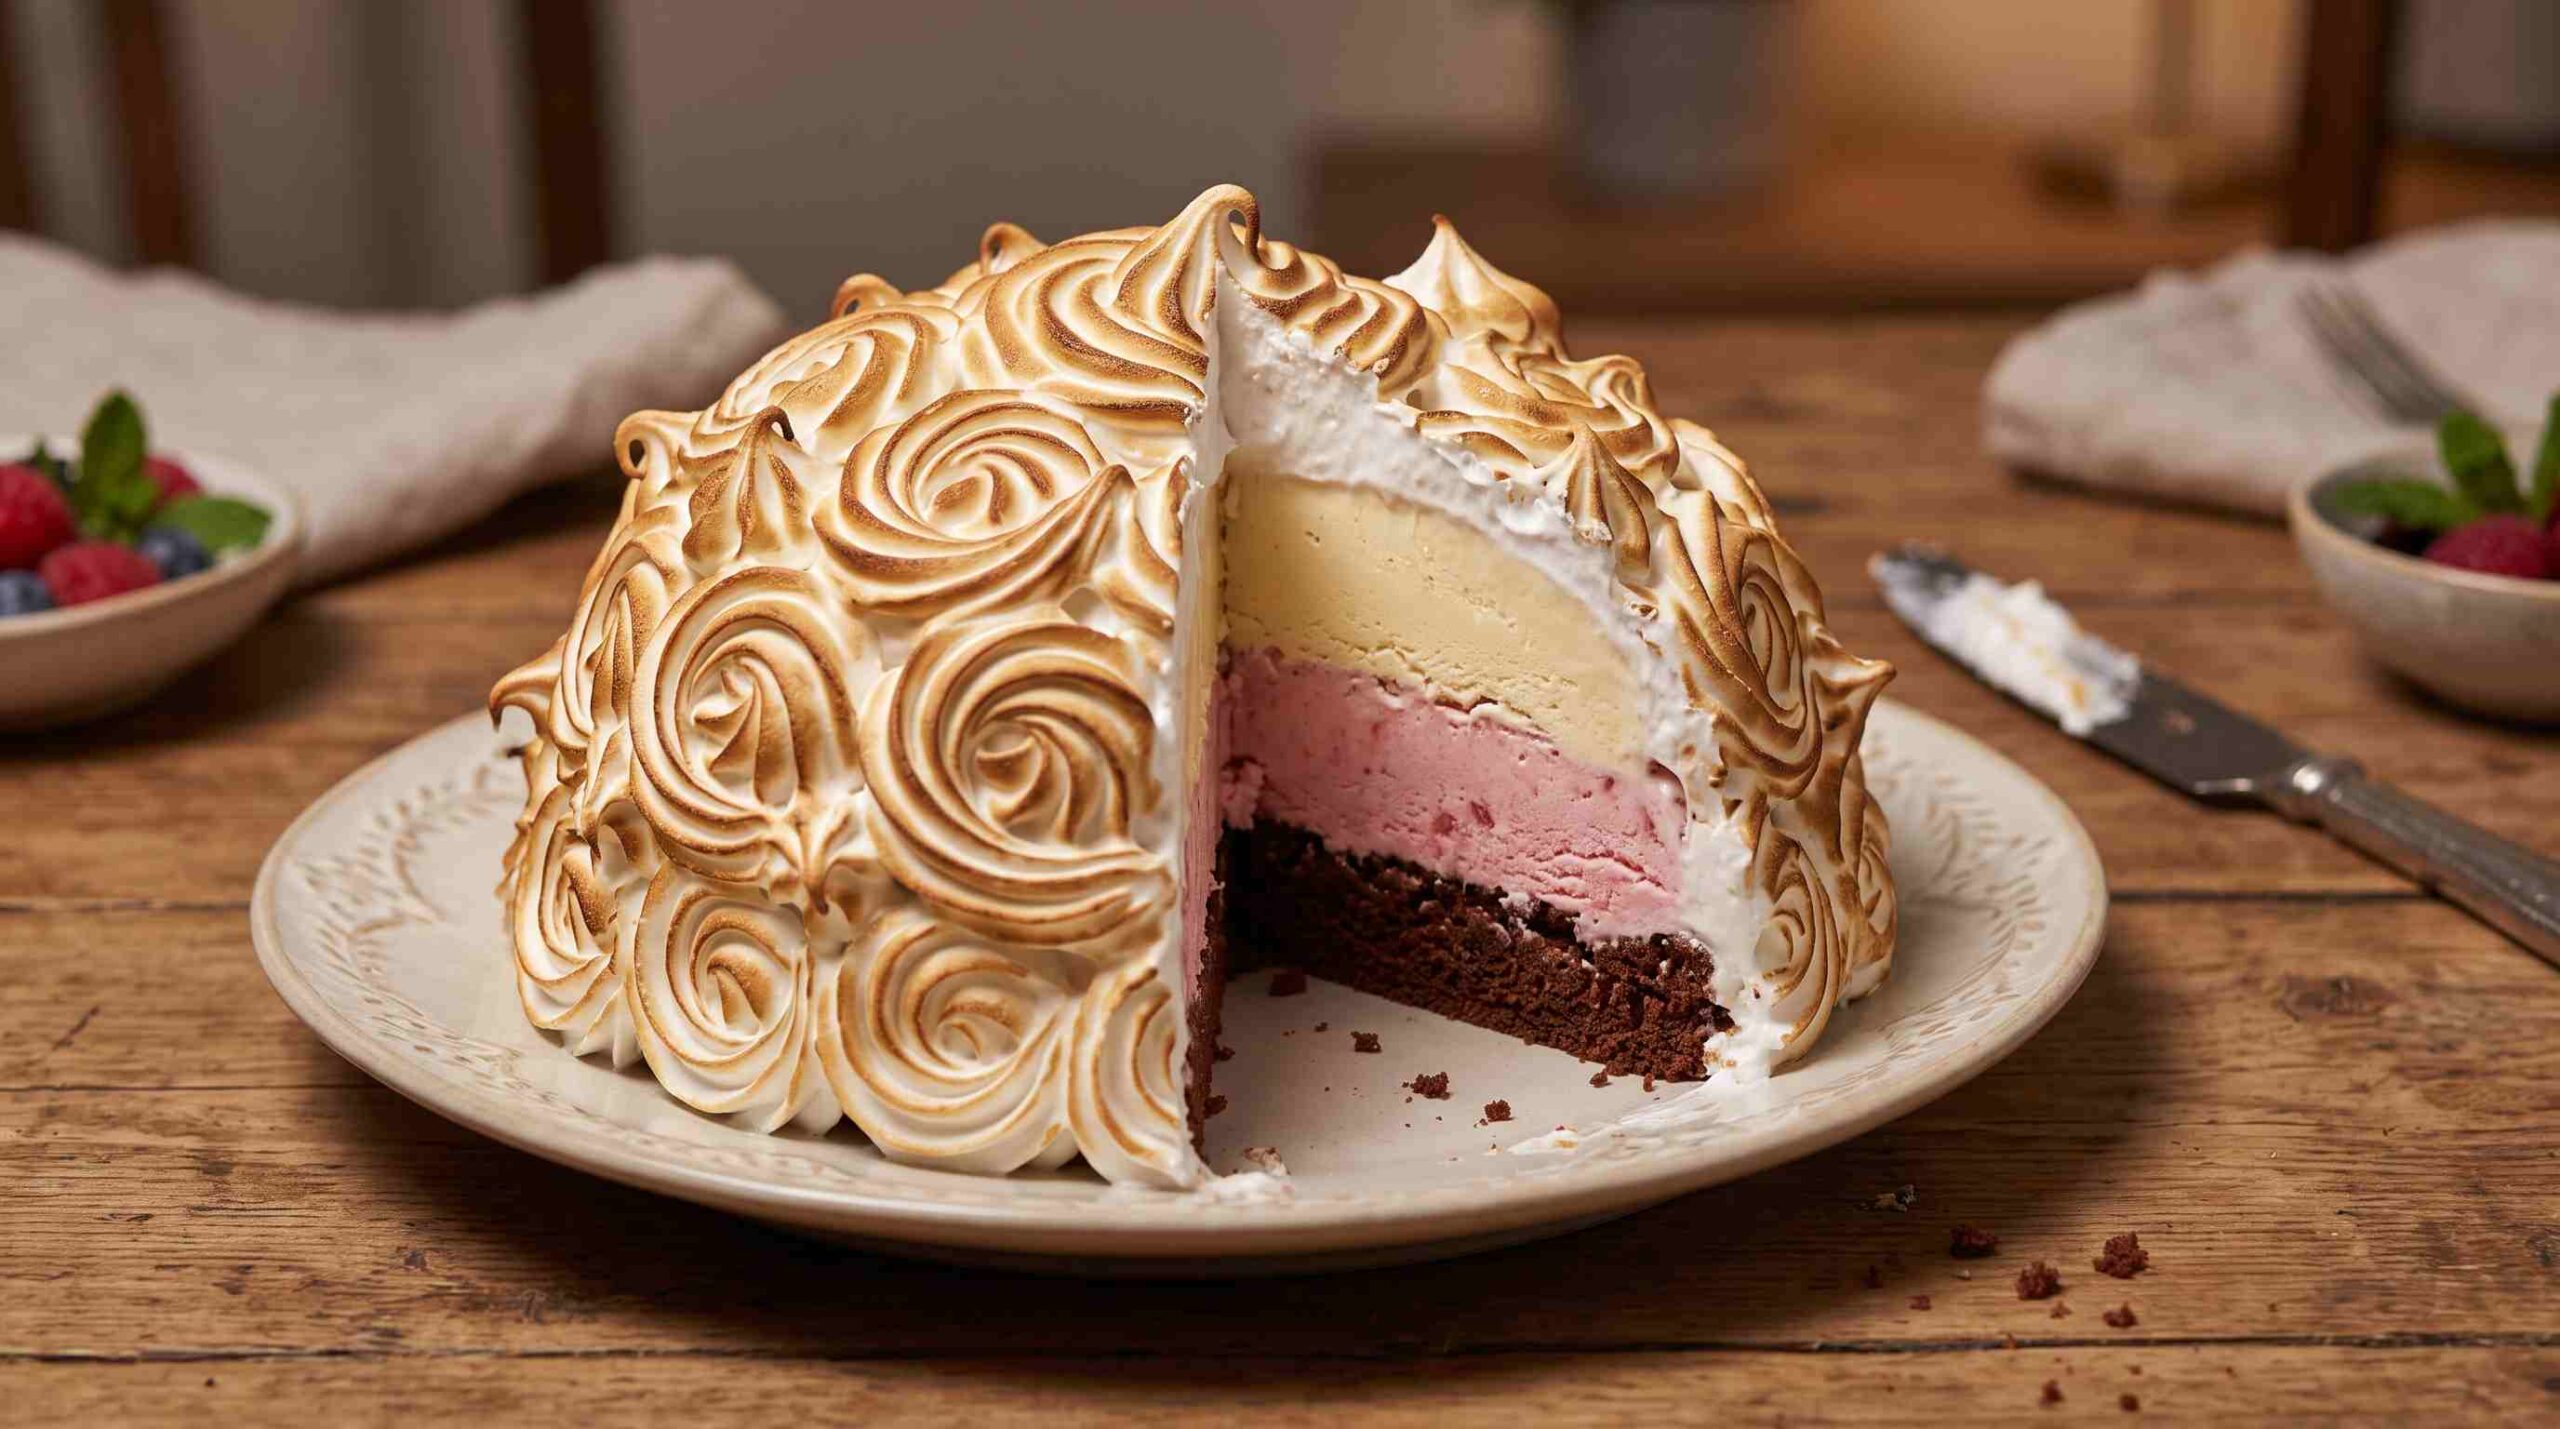
Baked Alaska is a dessert made of three layers: a sponge cake base, a dome of ice cream, and a thick coat of meringue. Bakers briefly bake or torch the whole thing so the meringue browns on the outside while the ice cream stays frozen underneath. That contrast — hot, toasted meringue against cold, creamy ice cream — is what makes baked Alaska so memorable. The name has nothing to do with the state of Alaska. It refers to the striking, icy-yet-warm effect instead, and that quirky contradiction makes the dessert fun to talk about at the table.
The History Behind Baked Alaska
Baked Alaska has delighted diners for well over a century. Its backstory is almost as entertaining as the dessert itself. Delmonico’s restaurant in New York credits French chef Charles Ranhofer with inventing the dish there. The name commemorates the United States’ purchase of the Alaska Territory in 1867, which explains the otherwise puzzling title. Chefs were experimenting with hot-and-cold desserts long before modern kitchens made the trick easy. They relied on meringue’s insulating properties to shield the ice cream from oven heat. That same basic science still makes baked Alaska work today.
Want to dig into why meringue insulates ice cream so well? Serious Eats breaks down the science behind the dish, including why air pockets in whipped egg whites act like a protective blanket.
How Baked Alaska Is Made
Making baked Alaska at home comes down to two things: assembling the layers correctly and giving yourself enough freezer time between steps. Start with a round of sponge cake or pound cake as your base. This gives the dessert structure and something sturdy to slice through later. Next, mound softened ice cream on top of the cake and shape it into a dome. Freeze the whole thing solid for several hours or overnight. Skip this step and your ice cream won’t survive the heat that comes next.
Once your base is completely frozen, whip egg whites with sugar until you get a glossy, stiff meringue. Spread or pipe it generously over the dome, and make sure no ice cream peeks through any gaps. The meringue layer needs enough thickness to fully insulate the ice cream from heat. Finally, slide the baked Alaska under a hot broiler for a minute or two, or torch it with a kitchen blowtorch. You just need enough heat to brown the meringue peaks without melting the ice cream inside. Many bakers prefer the torch method for baked Alaska. It gives more control than an oven broiler, which can heat unevenly and melt the dessert before the meringue browns properly.
Tips for Making Baked Alaska at Home
A few small details separate a baked Alaska that holds together from one that collapses into a puddle. First, always use very firm, fully hardened ice cream. Soft-serve consistency won’t survive the broiling step. Second, whip your meringue until it’s stiff and stable. Under-whipped egg whites won’t hold their shape or insulate properly. Third, work quickly once the cake and ice cream base comes out of the freezer. Every minute at room temperature chips away at your safety margin before torching.
Build your baked Alaska on a surface you can move straight from freezer to oven to table, such as a cake board or parchment-lined sheet pan. This cuts down on unnecessary handling. If you’re nervous about your first attempt, practice piping meringue on a plate before you commit it to the dessert. For a visual walkthrough of the assembly, check BBC Good Food’s guide, a resource many home bakers return to.
Creative Variations of Baked Alaska
The classic vanilla-and-sponge version is a crowd favorite, but baked Alaska also makes a fantastic canvas for experimentation. Swap in different ice cream flavors — strawberry, pistachio, or coffee — and you’ll change the entire character of the dessert without touching the technique. Some bakers layer two or three ice cream flavors inside one baked Alaska for a striped effect when they slice it open. Others swap the plain sponge cake for brownie, chocolate cake, or even a crushed cookie crust.
Individual baked Alaska servings, made in ramekins or muffin tins instead of one large dome, have also become popular for dinner parties. They’re easier to portion and torch evenly. However you customize it, the fundamental idea stays the same: a well-insulated frozen center under a browned meringue shell.
Serving and Storing Baked Alaska
Serve baked Alaska immediately after torching or broiling, while the meringue is still warm and the ice cream underneath is still properly frozen. The dramatic moment of slicing into it — revealing toasted meringue, cake, and cold ice cream in one cross-section — is really the whole point, so don’t let it sit around too long before you cut in.
Baked Alaska doesn’t store well once torched, since the meringue softens in the freezer over time. Instead, freeze the assembled cake-and-ice-cream base ahead of time, undecorated, and add the meringue shell fresh right before serving. That way, your next baked Alaska is just a quick meringue-and-torch session away whenever the craving strikes.