If you want a creamy, rich dessert without turning on the oven, try a no bake cheesecake filling. It’s smooth, tangy, and comes together in minutes. This makes it one of the most forgiving desserts a home baker can master. Whether you’re short on time, nervous about baking from scratch, or just craving something cool, learning how to make this dessert will change the way you think about no-bake baking.
What Makes This Cheesecake Filling Different
This filling relies on chilling, not heat, to set its structure. So you skip the water bath. There’s no worry about cracks on top, and no risk of overbaking. Additionally, the texture of a well-made no bake cheesecake filling is lighter and fluffier than a baked version. Think of it as a cross between mousse and classic cheesecake. Because the mixture sets in the refrigerator, patience matters, but the payoff is a dessert that feels effortless yet impressive.
Most recipes rely on a few core ingredients: softened cream cheese, sugar, vanilla extract, and whipped cream or heavy cream. Some cooks add a small amount of gelatin to help the mixture hold its shape, though many skip this step and still get great results. According to America’s Test Kitchen, full-fat cream cheese at room temperature is essential for a smooth, lump-free filling, since cold cream cheese tends to clump when mixed.
Choosing the Right Ingredients for Your Filling
The quality of your dessert depends on the ingredients you pick. Always choose full-fat cream cheese over reduced-fat versions, since fat adds flavor and helps the mixture set properly. Powdered sugar also works better than granulated sugar here, because it dissolves easily and creates a silkier texture.
Heavy whipping cream is another must-have. Once whipped to stiff peaks, it gets folded into the cream cheese base, adding air and lightness to the overall mixture. For a tangier result, try a spoonful of sour cream or Greek yogurt. Meanwhile, flavor variations like lemon zest, cocoa powder, or fruit puree can all be folded in to change up your base. If you’re also working on a crust from scratch, our guide to the perfect graham cracker crust covers that step in detail.
Step-by-Step Process for the Perfect No Bake Cheesecake Filling
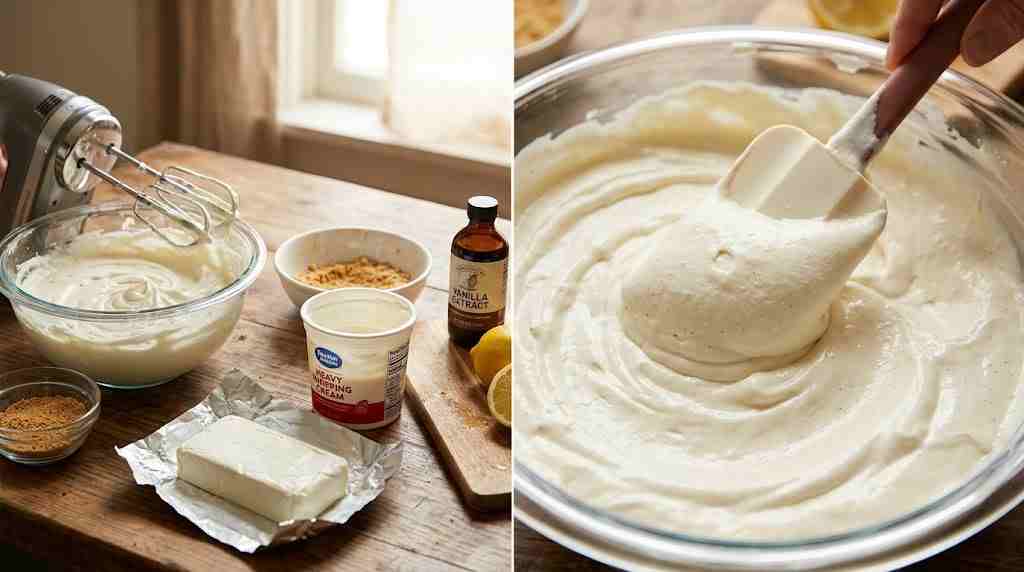
Start by beating softened cream cheese until it’s completely smooth, checking carefully for lumps, since these will show up in the finished texture. Once smooth, mix in powdered sugar and vanilla extract until fully combined.
Next, whip heavy cream in a separate bowl until stiff peaks form. Then fold this whipped cream into the cream cheese mixture in two or three additions rather than all at once. Folding slowly keeps the air bubbles intact, which is what gives the final product its light, mousse-like quality. Overmixing, on the other hand, deflates the mixture and leaves you with a dense, heavy dessert.
Afterward, spread the mixture over a prepared crust, whether that’s a graham cracker base or a chocolate cookie crust. The dessert then needs to chill for at least four hours, though overnight is better. The Food Network notes that rushing this step is a common mistake, since an undercooled filling won’t hold its shape when sliced.
Common Mistakes With No Bake Cheesecake Filling
One frequent issue is using cold cream cheese straight from the fridge. It won’t blend smoothly, and it leaves small lumps throughout. Letting it sit at room temperature for 30 minutes before mixing solves this problem entirely.
Another common mistake is overwhipping the heavy cream. Cream whipped past stiff peaks looks grainy and can separate, which hurts the final texture. Instead, stop whipping slightly before you think it’s ready, since folding will firm it up the rest of the way.
Skipping the chilling time is a third frequent error. Without enough time in the fridge, the mixture stays too soft to hold its shape when served. If you’re in a rush, the freezer can speed things up for about an hour, though the refrigerator remains the safer long-term option.
Flavor Variations Worth Trying
Once you’ve mastered the base recipe, there’s plenty of room to get creative. A classic lemon version, for instance, uses fresh lemon juice and zest for a bright, tangy twist that pairs beautifully with a graham cracker crust. Chocolate lovers, on the other hand, can fold in melted, cooled chocolate or cocoa powder for a rich, decadent variation.
Fruit-based versions are another popular option, using purees from strawberries, raspberries, or mango for natural sweetness and color. Rather than mixing the puree in fully, try swirling it through for a marbled effect that looks as good as it tastes. For something more indulgent, crushed cookies or candy pieces can be folded in just before the mixture goes into the crust. For more ideas, check out our collection of easy no-bake dessert recipes.
Storing and Serving Your Dessert
A finished no bake cheesecake filling keeps well in the refrigerator for up to five days when covered tightly. As a result, it makes an excellent make-ahead dessert for gatherings, since it can be prepared a day or two in advance without any loss in quality. If you’d rather freeze it, the mixture generally holds up well for up to a month, though it’s best to thaw it slowly in the fridge rather than at room temperature.
When it’s time to serve, a warm knife makes slicing much easier, since the fat in the filling tends to stick to a cold blade. Simply run your knife under hot water and wipe it dry between cuts for neat, bakery-style slices every time.
Final Thoughts on No Bake Cheesecake Filling
A good no bake cheesecake filling proves you don’t need an oven to create a dessert that feels special. With the right ingredients, a little patience during chilling, and careful attention while folding, anyone can make a version that rivals the baked original in both flavor and texture. Once you’ve nailed the basic method, experimenting with flavors becomes half the fun, turning this simple recipe into a dessert you’ll want to make again and again.